> ## Documentation Index
> Fetch the complete documentation index at: https://docs.recordengine.ai/llms.txt
> Use this file to discover all available pages before exploring further.
# Quick Start Tutorial
> Get from zero to your first processed document in under 10 minutes.
This tutorial walks you through the core RecordEngine workflow end to end. By the end you will have created a client, uploaded a document, watched the AI extract its data, and approved it for export.
This tutorial assumes RecordEngine is already installed and running. If you haven't installed it yet, see the [Installation Guide](/getting-started/installation) first.
## Before you start
You need:
* RecordEngine running and accessible in your browser (e.g. `http://localhost:8501` or your server URL)
* Admin credentials (set during first-time setup)
* A sample invoice PDF — any invoice will do, even a printed and scanned one
***
## Step 1 — Log in
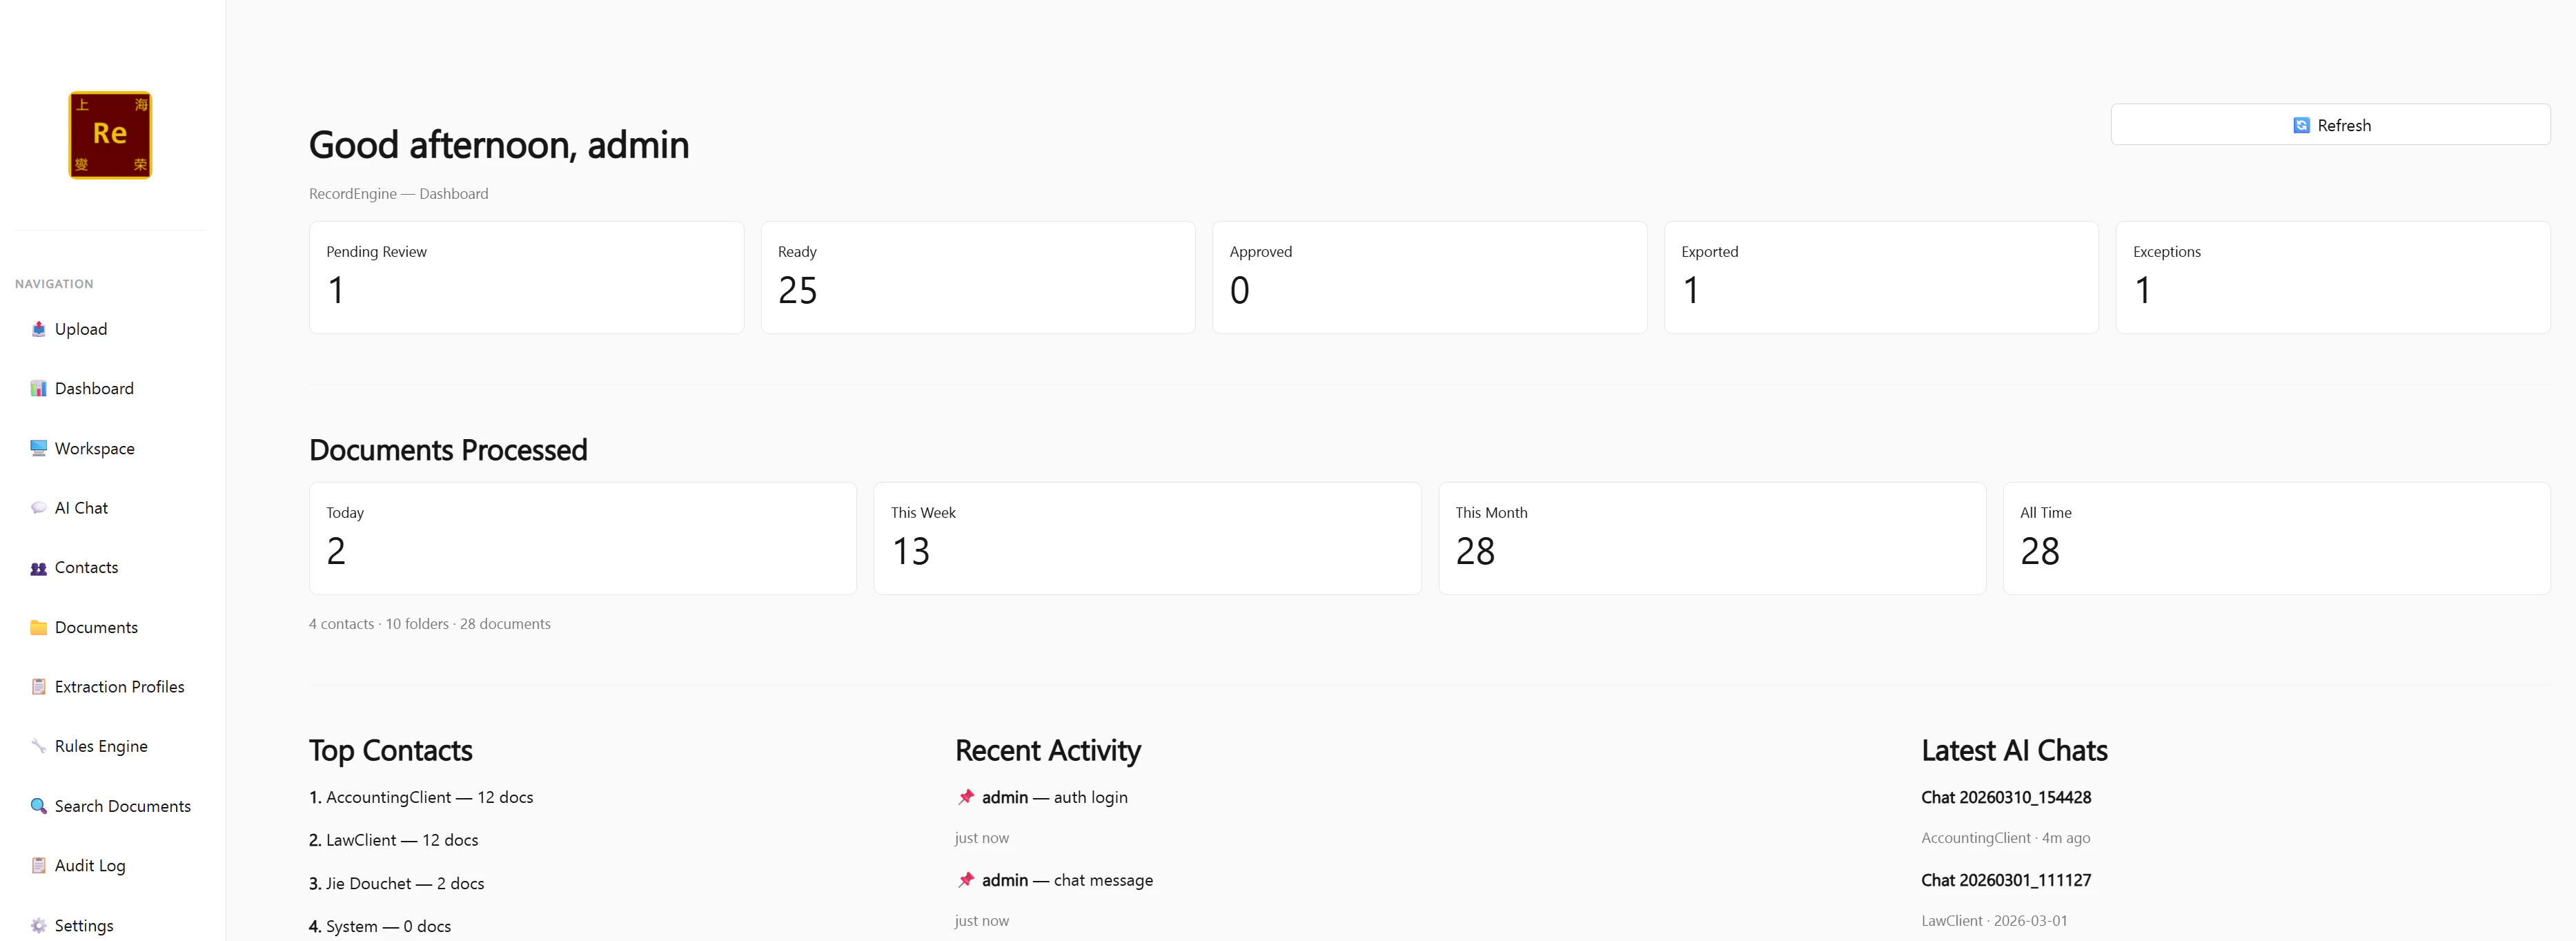
Open RecordEngine in your browser and log in with your admin credentials.
You'll land on the **Dashboard**, which shows a summary of all documents in the system. It's empty for now — that's expected.
 ***
## Step 2 — Create a contact
Every document in RecordEngine belongs to a contact. A contact represents a client, vendor, or any entity whose documents you're managing.
1. Click **Contacts** in the left sidebar
2. Click **+ New Contact**
3. Fill in:
* **Name:** `Acme Corporation` (or any name)
* **Type:** `Client`
* **Email:** optional for now
4. Click **Save**
The contact is created with two default folders already inside it: **Documents** and **Review**.
***
## Step 2 — Create a contact
Every document in RecordEngine belongs to a contact. A contact represents a client, vendor, or any entity whose documents you're managing.
1. Click **Contacts** in the left sidebar
2. Click **+ New Contact**
3. Fill in:
* **Name:** `Acme Corporation` (or any name)
* **Type:** `Client`
* **Email:** optional for now
4. Click **Save**
The contact is created with two default folders already inside it: **Documents** and **Review**.
 You can set a **Default Extraction Profile** on each contact so that all documents uploaded to that contact automatically use the right profile. For this tutorial, leave it as Default.
***
## Step 3 — Upload a document
1. Click **Upload** in the left sidebar
2. Drag and drop your invoice PDF onto the upload zone, or click to browse
3. Set:
* **Contact:** `Acme Corporation`
* **Folder:** `Documents`
* **Extraction Profile:** `Standard Invoice`
4. Click **Upload**
You can set a **Default Extraction Profile** on each contact so that all documents uploaded to that contact automatically use the right profile. For this tutorial, leave it as Default.
***
## Step 3 — Upload a document
1. Click **Upload** in the left sidebar
2. Drag and drop your invoice PDF onto the upload zone, or click to browse
3. Set:
* **Contact:** `Acme Corporation`
* **Folder:** `Documents`
* **Extraction Profile:** `Standard Invoice`
4. Click **Upload**
 The document appears in the list with status **New**, then almost immediately changes to **Processing**.
The first document after a server restart takes longer to process (up to a few minutes) because the AI model loads into GPU memory. Subsequent documents process in seconds.
***
## Step 4 — Watch the AI extract
Once processing completes, the status changes to **Needs Review**. This means the AI has finished and is waiting for a human to verify the results.
Click on the document to open it. You'll see a three-panel layout:
The document appears in the list with status **New**, then almost immediately changes to **Processing**.
The first document after a server restart takes longer to process (up to a few minutes) because the AI model loads into GPU memory. Subsequent documents process in seconds.
***
## Step 4 — Watch the AI extract
Once processing completes, the status changes to **Needs Review**. This means the AI has finished and is waiting for a human to verify the results.
Click on the document to open it. You'll see a three-panel layout:
 The three panels are:
| Panel | What you see |
| ---------- | --------------------------------------------------- |
| **Left** | Original document preview (PDF render or image) |
| **Centre** | AI summary, confidence score, and document metadata |
| **Right** | Extracted fields, line items, actions, and notes |
Scroll through the extracted fields on the right. For a Standard Invoice, you'll see fields like **Vendor**, **Invoice Number**, **Invoice Date**, **Due Date**, **Currency**, **Subtotal**, **Tax**, and **Total Amount** — all filled in by the AI.
### Understanding the confidence score
Below the AI summary, you'll see a coloured badge:
| Badge | Score | What it means |
| ----------- | ------ | ------------------------------------------- |
| 🟢 **High** | 90–100 | All fields extracted cleanly |
| 🔵 **Good** | 70–89 | Minor uncertainty on one or two fields |
| 🟡 **Low** | 50–69 | Several fields uncertain — review carefully |
| 🔴 **Poor** | 0–49 | Significant extraction problems |
A clean, well-formatted invoice should score 80 or above. A blurry scan might score 40–60.
***
## Step 5 — Edit a field (optional)
If any field is wrong or missing, you can correct it directly:
1. Click **Edit** in the right panel
2. Click on any field value and type the correct value
3. Click **Save**
Changes are saved immediately and logged in the Audit Log.
***
## Step 6 — Approve the document
Once you've verified the extracted data:
1. In the right panel, click **Mark as Ready**
2. The status changes to **Ready**
3. Click **Approve**
4. The status changes to **Approved** — the document is now locked against further edits
The three panels are:
| Panel | What you see |
| ---------- | --------------------------------------------------- |
| **Left** | Original document preview (PDF render or image) |
| **Centre** | AI summary, confidence score, and document metadata |
| **Right** | Extracted fields, line items, actions, and notes |
Scroll through the extracted fields on the right. For a Standard Invoice, you'll see fields like **Vendor**, **Invoice Number**, **Invoice Date**, **Due Date**, **Currency**, **Subtotal**, **Tax**, and **Total Amount** — all filled in by the AI.
### Understanding the confidence score
Below the AI summary, you'll see a coloured badge:
| Badge | Score | What it means |
| ----------- | ------ | ------------------------------------------- |
| 🟢 **High** | 90–100 | All fields extracted cleanly |
| 🔵 **Good** | 70–89 | Minor uncertainty on one or two fields |
| 🟡 **Low** | 50–69 | Several fields uncertain — review carefully |
| 🔴 **Poor** | 0–49 | Significant extraction problems |
A clean, well-formatted invoice should score 80 or above. A blurry scan might score 40–60.
***
## Step 5 — Edit a field (optional)
If any field is wrong or missing, you can correct it directly:
1. Click **Edit** in the right panel
2. Click on any field value and type the correct value
3. Click **Save**
Changes are saved immediately and logged in the Audit Log.
***
## Step 6 — Approve the document
Once you've verified the extracted data:
1. In the right panel, click **Mark as Ready**
2. The status changes to **Ready**
3. Click **Approve**
4. The status changes to **Approved** — the document is now locked against further edits
 Once a document is Approved it cannot be edited. If you need to make changes, you can upload a new version, or an Admin can revert the status.
***
## Step 7 — Export
Setting a document to **Export** status triggers the outbound webhook — this is how RecordEngine pushes structured data to your accounting system, CRM, or any other endpoint.
1. With the document open, click **Export** (or **Webhook Export**)
2. Status changes to **Export**
3. If a webhook URL is configured in Settings, RecordEngine sends a POST request with the full structured payload within seconds
Don't have a webhook set up yet? That's fine — skip this step for now. See [Settings & Configuration](/user-guide/settings) to add your webhook URL when you're ready.
***
## What you just did
In under 10 minutes you completed the full RecordEngine document lifecycle:
```
Upload → AI Extraction → Confidence Scoring → Review → Approve → Export
```
Every step is logged in the [Audit Log](/user-guide/audit-log). Every extracted field is searchable via [Advanced Search](/user-guide/advanced-search). And every outbound webhook can be routed to Salesforce, QuickBooks, Xero, or any other system.
***
## Next steps
Create custom profiles for your document types — so the AI always extracts exactly the fields you need.
Automate your review workflow — auto-flag low confidence documents, auto-move approvals, auto-notify reviewers.
Ask questions across all your documents in plain language. "What is the total of all Acme invoices this month?"
Connect RecordEngine to Salesforce, QuickBooks, Xero, or any system that accepts a webhook.
Once a document is Approved it cannot be edited. If you need to make changes, you can upload a new version, or an Admin can revert the status.
***
## Step 7 — Export
Setting a document to **Export** status triggers the outbound webhook — this is how RecordEngine pushes structured data to your accounting system, CRM, or any other endpoint.
1. With the document open, click **Export** (or **Webhook Export**)
2. Status changes to **Export**
3. If a webhook URL is configured in Settings, RecordEngine sends a POST request with the full structured payload within seconds
Don't have a webhook set up yet? That's fine — skip this step for now. See [Settings & Configuration](/user-guide/settings) to add your webhook URL when you're ready.
***
## What you just did
In under 10 minutes you completed the full RecordEngine document lifecycle:
```
Upload → AI Extraction → Confidence Scoring → Review → Approve → Export
```
Every step is logged in the [Audit Log](/user-guide/audit-log). Every extracted field is searchable via [Advanced Search](/user-guide/advanced-search). And every outbound webhook can be routed to Salesforce, QuickBooks, Xero, or any other system.
***
## Next steps
Create custom profiles for your document types — so the AI always extracts exactly the fields you need.
Automate your review workflow — auto-flag low confidence documents, auto-move approvals, auto-notify reviewers.
Ask questions across all your documents in plain language. "What is the total of all Acme invoices this month?"
Connect RecordEngine to Salesforce, QuickBooks, Xero, or any system that accepts a webhook.